
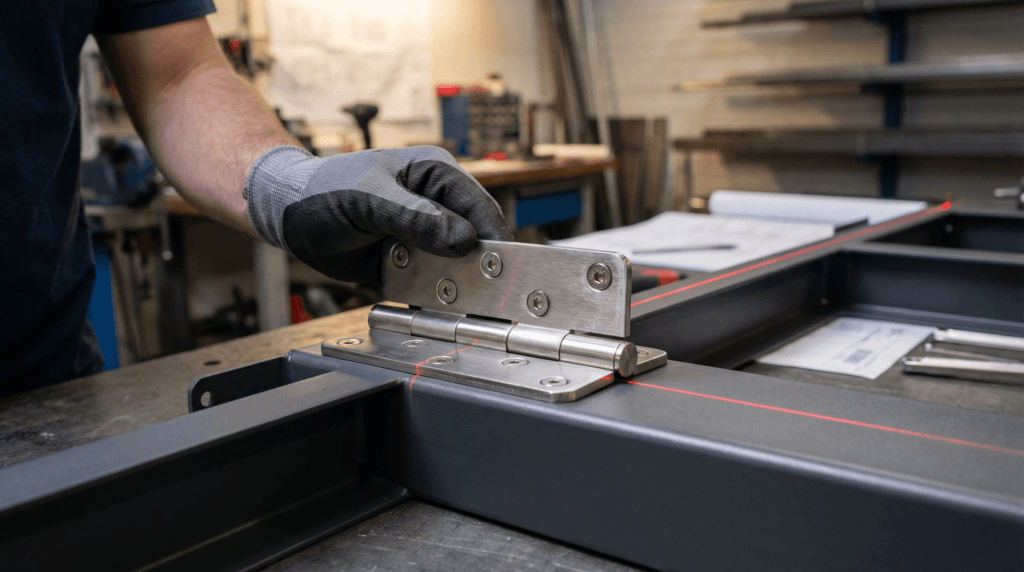
Specifying the perfect friction hinges is only half the battle, you can source a premium, high-cycle torque hinge with the exact resistance profile your application demands, but if it is installed incorrectly on the assembly line, the entire system will fail.
We have seen it happen usually: a heavy industrial control panel is fitted with top-tier friction hinges, but within weeks, the door starts to sag, the hinges squeak, and the torque decays rapidly. In almost every case, the root cause is not a defective hinge—it is improper installation, specifically poor axis alignment or incorrect fastening techniques .
Friction hinges (also known as torque hinges or position control hinges) rely on highly calibrated internal friction bands or disc stacks to hold panels at specific angles. Unlike free-swinging hinges, they are completely unforgiving of lateral stress or binding forces caused by a crooked installation. Talk on Whatsapp
Pre-Installation: The Engineering Prerequisites
Before a single hole is drilled or a bolt is tightened, your team must ensure that the structural foundation is prepared for the unique stresses generated by friction hinges.
1. Evaluate Mounting Surface Rigidity
When you open a door equipped with a friction hinge, the hinge resists the motion. This resistance transfers a significant bending moment directly into the mounting surface. If you are mounting a high-torque hinge onto thin sheet metal or a flexible plastic substrate, the material will flex before the hinge even begins to rotate. This deflection causes a “spongy” feel and leads to premature metal fatigue.
•The Fix: Always reinforce the mounting area with a backing plate, thicker gauge material, or structural ribs to ensure absolute rigidity.
2. Gather the Right Tools
Precision installation requires precision tools. Do not rely on “eyeballing” the alignment.
•Calibrated laser level or a precision straightedge (machinist’s rule)
•Torque wrench (for tightening fasteners to exact specifications)
•High-strength fasteners (Class 8.8 or Grade 5 minimum, typically hex socket cap screws)
•Threadlocker (e.g., Loctite Blue) or locking washers for high-vibration environments
•Shims (for temporary alignment during the fitting process)
The 5-Step Professional Fitting Process
Installing a friction hinge is not like slapping a standard door hinge onto a wooden frame. It requires a systematic approach to guarantee that the pivot axes of multiple hinges are perfectly co-linear.
| Step | Action Required | Engineering Rationale |
| 1. Establish the Reference Axis | Use a laser level or straightedge to draw a perfectly straight reference line across the frame where the hinges will sit. Mark the hole centers precisely. | If the rotational axes of two hinges are off by even a fraction of a degree, they will “fight” each other during rotation, causing binding and rapid torque decay . |
| 2. Mount the Frame Leaves (Loose Fit) | Attach the stationary leaves (the halves of the hinges that attach to the main body/frame) using the correct fasteners. Do not fully tighten them yet. Leave them finger-tight so the hinges can shift slightly. | A loose fit allows the hinges to self-align to the natural pivot axis once the door panel is introduced. |
| 3. Attach the Door Panel | Bring the door panel or lid into position. If the door is heavy, use temporary shims or a lift cart to hold it at the correct height and gap distance. Attach the moving leaves of the hinges to the door panel, again leaving the fasteners finger-tight. | Supporting the weight of the door prevents gravity from pulling the hinges out of alignment while you are inserting the screws. |
| 4. Cycle to Self-Align | Carefully open and close the door panel through its full range of motion (0° to 90° or 180°) at least three to five times. | This is the most critical step. As the door moves, the loose fasteners allow the hinges to naturally shift into perfect coaxial alignment, eliminating binding stresses. |
| 5. Final Torque Down | Move the door to the fully closed position. Using a torque wrench, tighten all fasteners to the manufacturer’s specified torque rating in a cross-pattern (like tightening lug nuts on a car tire). | Tightening in the closed position ensures the panel gaps remain uniform. The cross-pattern prevents warping the hinge baseplate. |

3 Fatal Installation Mistakes to Avoid
Even experienced technicians can make critical errors when working with torque hinges for the first time. Ensure your assembly instructions explicitly forbid the following practices.
Mistake 1: Forcing Alignment with a Hammer
If the door does not close perfectly flush, a technician might tap the hinge barrel with a mallet to shift it. Never strike a friction hinge. The internal friction elements (especially curled spring steel or precision-stamped discs) are highly sensitive to impact. A single blow can deform the friction band, instantly destroying the hinge’s holding power and creating “dead spots” in the rotation.
Mistake 2: Applying Lubrication
Because friction hinges are stiff by design, well-meaning maintenance staff often spray them with WD-40, lithium grease, or penetrating oil to make them “smoother.” This is a catastrophic error. Torque hinges rely entirely on engineered dry friction. Adding wet lubrication destroys the friction coefficient, causing the heavy door to crash down instantly. If a hinge is squeaking or binding, it is either misaligned or has reached the end of its life—lubrication will not fix it.
Mistake 3: Using Countersunk Screws in Flat Holes
Always match the fastener head type to the hinge hole profile. If the hinge has flat, unchamfered holes, you must use pan-head or hex-socket cap screws. Forcing a countersunk (V-shaped) screw into a flat hole will aggressively push the hinge out of alignment as the screw is tightened, ruining the coaxial setup you achieved in Step 4.
Procurement Advice: Designing for Assembly (DFA)
If you are a procurement manager or design engineer looking to reduce assembly time and installation errors on the factory floor, consider specifying hinges with built-in alignment features.
At Janhinge, we offer friction hinges with locating pins (bosses) cast directly into the back of the hinge leaves. These pins drop into pre-drilled pilot holes on your enclosure, forcing the hinge into perfect alignment instantly without the need for laser levels or complex jigs. Furthermore, utilizing hinges with slotted mounting holes provides your technicians with the necessary tolerance to adjust panel gaps perfectly before the final torque-down.
Properly fitted friction hinges will provide tens of thousands of smooth, reliable position-control cycles. If you are experiencing premature hinge failures, or if you need to specify a custom torque profile for your next heavy-duty project, our engineering team is here to help. Contact Janhinge today to discuss your application and request CAD models or physical samples.
Frequently Asked Questions (FAQ)
Q1: How do I ensure two friction hinges are perfectly aligned?
The most reliable method is the “loose fit and cycle” technique. Mount all hinges with the screws only finger-tight. Attach the door, and swing it open and closed several times. The hinges will naturally pull themselves into coaxial alignment. Once aligned, carefully tighten the screws to the final torque specification.
Q2: Can I weld a friction hinge instead of using screws?
It is highly discouraged unless the hinge is specifically designed and rated for welding. The extreme heat generated during welding will transfer into the hinge barrel, melting the synthetic friction pads, destroying the internal grease (if present), and altering the temper of the spring steel bands. Always use mechanical fasteners for standard friction hinges.
Q3: The door panel squeaks loudly when opened, but the hinges are brand new. Why?
A squeaking noise on a new installation is almost always a symptom of severe axial misalignment. The two hinges are not perfectly parallel, causing the pivot shafts to bind and grind against the hinge knuckles. Loosen the fasteners on one hinge, cycle the door to relieve the stress, and re-tighten.
Q4: How many friction hinges should I use on a single door?
For standard applications, two hinges are optimal. Using three or more friction hinges on a single rigid door dramatically increases the difficulty of achieving perfect coaxial alignment. If three hinges are slightly out of line, they will bind severely. If you need more torque, it is better to use two larger hinges rather than three smaller ones.
Q5: Should I use a torque wrench to install the mounting screws?
Yes. Over-tightening the mounting screws can warp the baseplate of the hinge, which in turn distorts the barrel and alters the internal friction profile. Under-tightening can allow the hinge to shift during use. Always follow the fastener manufacturer’s recommended torque specs for the specific screw size and material.
To discuss custom position control solutions for your industrial or consumer electronics manufacturing needs, contact the engineering team at www.janhinge.com.